Exploring Android O: Autosizing TextViews

With the release of first developer preview of Android O, Google come with a solution to auto-size text in a TextView similar to the way the iOS SDK allows to select “fit text to box”.
Let’s take a look at this exciting new feature and how we can implement it into our Android applications!
Autosizing TextViews
Android O allows to instruct a TextView to let the size of the text expand or contract automatically to fill its layout based on the TextView's characteristics and boundaries. This setting makes it easier to optimize the text size on different screens with dynamic content.
Creating New Project
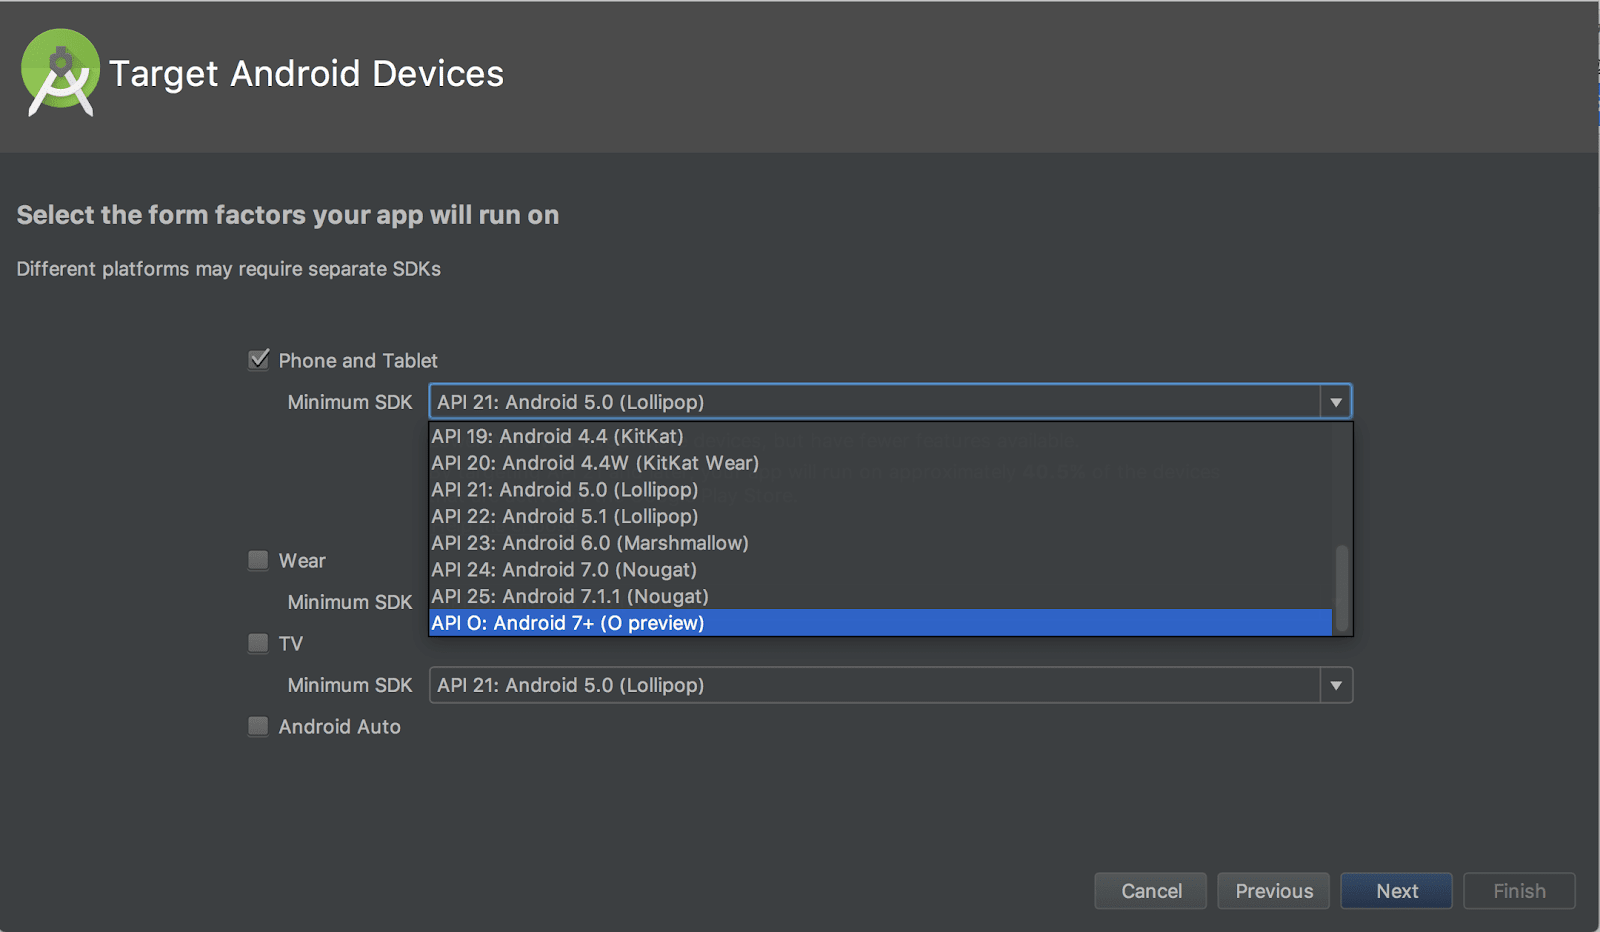
We’ll start by creating new project in Android Studio and do the basic setup required.Create a new project in Android Studio from File > New Project and fill the project details. While creating the project, select the API O: Android 7+(O preview) as Minimum SDK.
Update Build Configuration
Open build.gradle located under app module and Update compileSdkVersion, buildToolsVersion, targetSdkVersion, and the Support Library version with the following versions:
Textview Autosizing in XML
There are two ways to set up TextView Autosizing in XML. By using Granularity and Preset Sizes.
Granularity
By using granularity, we can specify a range of minimum and maximum text sizes and a dimension that specifies the size of each step. The TextView can uniformly scale, in a range between the given minimum and maximum size attributes. Each increment takes on the step size specified in the granularity attribute.
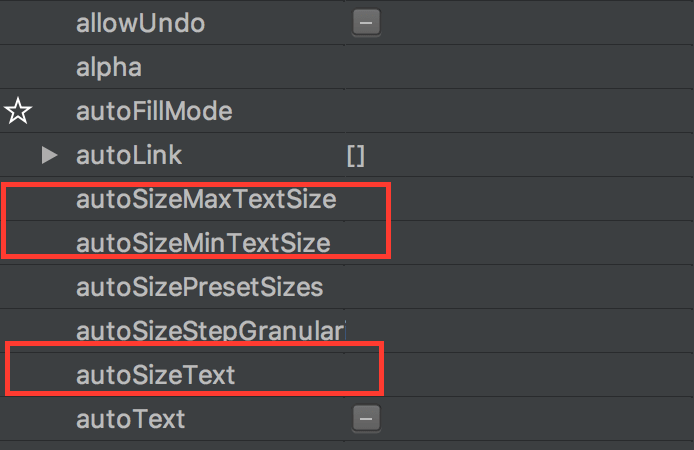
- autoSizeText: attribute to instruct the TextView to auto-size. The valid values are none, which is a default value, and uniform.
- autoSizeMinTextSize: The minimum text size constraint to be used when auto-sizing text
- autoSizeMaxTextSize: The maximum text size constraint to be used when auto-sizing text
- autoSizeStepGranularity: attributes to set the autosizing dimensions in the layout XML file.The default is 1px. Overwrites autoSizePresetSizes if set.
Another method to define these attributes is to use the Properties window. Selected the Design tab at the bottom of the window and open the Properties window.
Preset Sizes
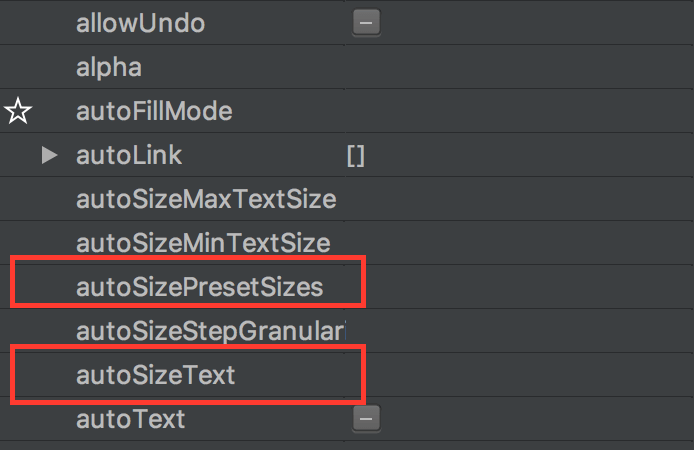
Preset sizes are used to, autosize the TextView from a list of predefined sizes. autoSizePresetSizes attribute in the layout XML file is used to instruct the TextView to auto-size from a size array.
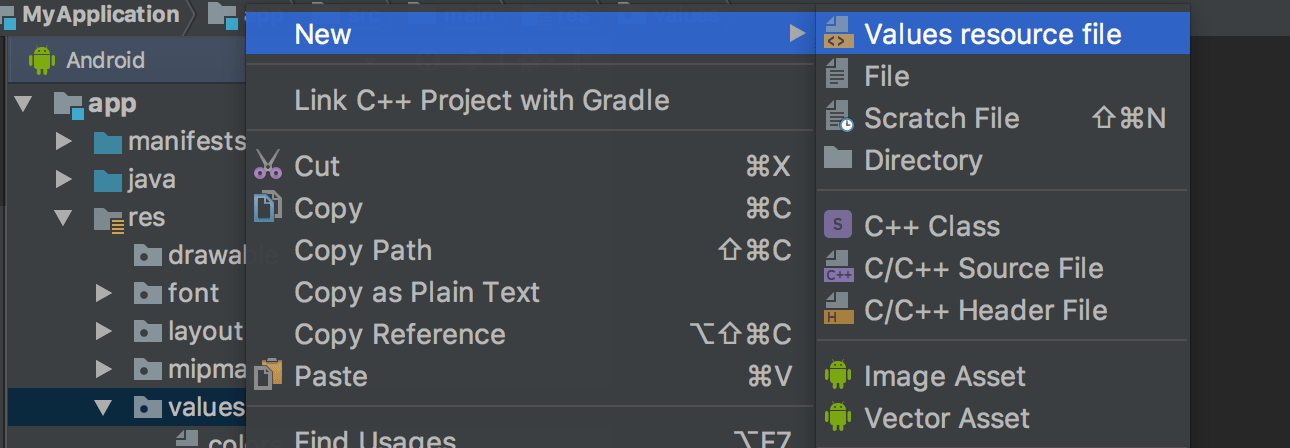
You can create a array file by the following steps
- Right-click the values folder and go to New > Values resource file.
- Give file name: arrays
You can also define these attributes in the Properties window in Android Studio.
Using Textview Autosizing programmatically
You can set up autosizing programmatically by using the following methods:
To set up the autosizing by using granularity, Call the setAutoSizeTextTypeUniformWithConfiguration(int autoSizeMinTextSize, int autoSizeMaxTextSize, int autoSizeStepGranularity, int unit) method. You can use any TypedValue dimension unit for maximum, minimum, and granularity values.
To set up the autosizing by using preset sizes, Call the setAutoSizeTextTypeUniformWithPresetSizes(int[] presetSizes, int unit) method. You can provide an array of sizes and any TypedValue dimension unit for the size.


ON what do you call this method?
ReplyDelete